By Julie Pendray
Thanks for following this travelogue of my trip around the United States and Canada. See North America through the eyes of a young “Kiwi” New Zealander traveling with her American husband in 1989. These brief recollections are from my journals and the postcards I mailed to family. They aren’t meant to be a definitive chronicle or advice on how to do such a trip. Instead, they create a snapshot of life on the road, discovering this wonderful country and what it was like sharing a small space for so long and how the trip was life changing. I hope my story inspires you to research the destinations and go on your own adventure.
To pick up the thread, you can read my introduction about how we decided to set off on this adventure in our 30s, by clicking here. Then read about what we packed before leaving San Diego, by clicking here.
 April 1989
Las Vegas
From my journal:
“As we drove northeast today we saw a double rainbow ahead of us over the highway. It looked like the letter M, an unusual sight. It seemed like a promise of a wonderful trip. We agree that we want to have fun, relax and not have expectations or pressures on this journey.”
Now on to …

Zion National Park, Utah
“The air has been so dry since we left Las Vegas. The weather has been great. Utah has a lot of mineral mining — uranium, manganese, copper and more. I’ve also noticed steeples on top of churches everywhere in Utah. We’re doing a lot of day hikes here at Zion in the southwest corner of Utah. The red sandstone reminds me of the Aussie soil. It’s made from hardened sand dunes, exposed after millions of years by wind and water — Utah used to include ocean. At Zion, we hiked some of the Narrows to Hidden Meadows Trail. In some sections we waded in shallow water. We decided not to go further because we knew it would get wetter as we went upstream.

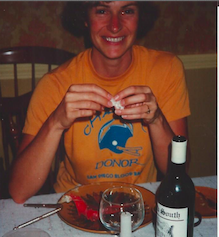
“We met a nice middle-aged couple from Indiana and invited them back for a visit in our motor home. I baked scones in our tiny oven and it felt so homey. What a good way to start our trip. I’m looking forward to meeting lots of people like this and having them visit our cozy home on wheels.”

I wrote “home” to my family in New Zealand:
“Last night, I baked prune scones for us and a couple we met on a hike. The guy has been to New Zealand to work at Greenlane Hospital with Sir Barratt-Boyes. He was a surgeon from Indiana and he’d heard of scones but never tasted them, so he got a kick out of it.”
To be continued. The next part will be about entering beautiful Colorado.
###
A little aside.
Here’s my mother’s scone recipe.
“Mum” was a farmer’s daughter of Scottish descent. Her recipe is a simple everyday variety. It’s a good place to start, then you can experiment and add grated vegetables or fruit if you like, and adjust the recipe accordingly. My favorite versions are date or apricot scones or vegetable ones that include carrots or zucchini. My mother’s mantra when folding in the milk and water was “Keep it light, so they rise.”

Ingredients:
8 oz self-rising flour, a pinch of salt,
2 oz sugar, 1 1/2 oz butter, 3 oz milk and water,
dried fruit, grated vegetables or sharp cheese if you like. Otherwise, make them plain and serve them with raspberry preserves and possibly Devonshire cream, also known as clotted cream.
Sift the flour, add salt and sugar, add grated butter and rub it into the mixture. Make a well in the center of the mix and pour in the milk/water combination, a few splashes at a time. Don’t let the mixture get too wet or dry. Dust a cutting board with flour and gently place the dough on it, so it doesn’t stick. Mould it gently into a square that is about 1 1/2 inches high, then cut into small squares. Place them close together on a floured baking tray and bake at 450 – 500 degrees Fahrenheit or roughly 230 – 260 degrees Celsius for 10 – 12 minutes. Don’t let them go very brown on the top and they are not supposed to be crisp around the edge. They should be soft and only light brown. To test whether they are done, lightly press one on the top and if it bounces back, it’s ready!
When you remove them from the oven, take them from the baking tray with a cake slice and put them in a paper bag or “tea towel” to let them steam. It will keep them soft and moist until you’re ready for them. Eat them warm with butter and preserves or instead of butter add the cream (unless you’ve made the vegetable variety). Eat them the day you make them, or add an egg to the recipe to make them last longer. Mum’s scones were eaten quickly in our household so it didn’t matter either way!
© Copyright to Julie Pendray and SpecialsNotOnTheMenu.com